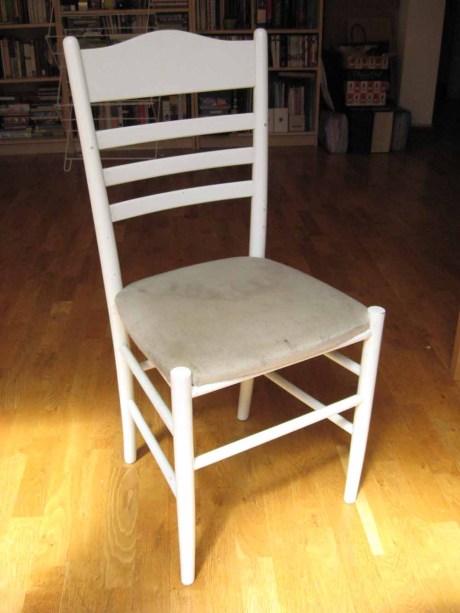
Old chair
When we moved into our new place in April, my husband’s family kindly gave us four dining room chairs that they’d had in their attic for 10 or 15 years. The gray seat covers were a little the worse for wear – a few food and water stains, plus natural ageing, had made them look pretty tired. We put some nice cushions on them to make them look prettier, but my plan had always been to repaint and recover them.
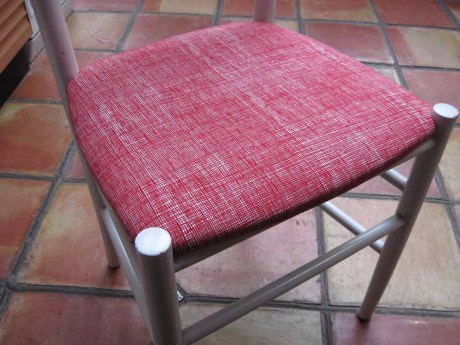
The repainting will have to be done some other time, but I’ve had the recovering fabric for ages now – my sister bought me Alexander Henry’s home-dec weight ‘Heath’ fabric in red for my birthday – so I finally got around to doing the first two out of four chairs last weekend.
My first tip: if the chairs are old, then when you’re removing the screws that attach the seats to the bases, replace them with new screws. The old ones will be rusty. Before we got the chairs my father-in-law had to re-cut one of the seat shapes because it had broken, and when he screwed it back onto the chair he used new screws. Nice touch. Even though you can’t see them, it makes a difference.
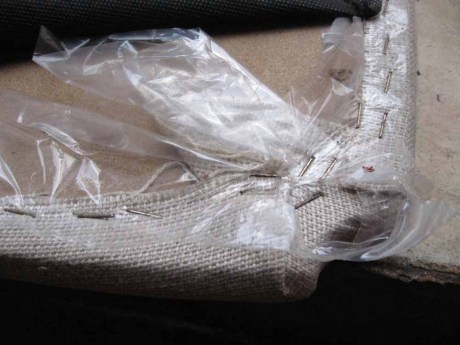
Second tip: a flat-head screwdriver and a pair of pliers will help you get the old staples out when you’re removing the old fabric. Wedge the screwdriver under the staples and press up just slightly – not too much, because this puts a lot of strain on your wrist. Use the pliers to do most of the work and pull out the staples. Depending on how old your chairs are, the staples may be rusty enough to break in two right in the middle, so you may have to pull out a lot of pieces. Again, don’t strain your wrists! There are a lot more staples than you’ll expect – there were about 100 in each seat on my chairs – so don’t do the staple removal all in one day. It takes much longer to remove the old staples than to put the new fabric on the seat.

Staples
Third tip: the chair manufacturer may have added some plastic while stapling the original fabric to the seat. I wondered why there was so much plastic, then realized it must be because the weave of the original seat fabric was quite loose – probably they didn’t want the threads to get pulled out of place by the staples, so the plastic piece was to smooth the surface down so there was less chance of catching the threads. It also might be to protect the fabric from the rust the staples will eventually get. Don’t be surprised by the plastic – but if your new fabric has a finer weave and you doubt your chairs are going to withstand much rust-inducing damage (like spilled drinks, maybe) then you don’t have to include a layer of plastic when you’re putting the new fabric on.
Tip 4: Use the old fabric piece from the chair seat as a template for the new one, but cut yours bigger. The ones on my chairs turned out to just be squares, which is what I suspect will happen on most normal-sized dining room chairs. That’s fine, but the manufacturer cut them the smallest size possible so as not to waste material. I don’t like wasting material, but I do like having some leeway to work with, so I cut my new fabric several inches bigger on each side. That way, I could staple it to the chair seat a little closer to the middle – thus covering up all the ugly holes the removed staples had just left, and stapling them to an area slightly closer to the centre of the seat, which was untouched and intact.
Tip 5: Pull the material as taut as possible and put a staple in the centre of each side and then in each corner so that the material is stretched as much as possible right away in all directions. Then go back and fill in the gaps. I certainly didn’t use 100 staples in one seat like the manufacturer originally did – I probably used around 40, spacing them out judiciously.

New chair
Tip 6: Your old chair might have come with another piece of cloth that was stapled on top of all the other stapling just to hide all the mess on the underside of the chair. You don’t need to add this to your newly-recovered chair, unless you’re a perfectionist. Just staple all the fabric in such a way so that nothing hangs down from the underside of the seat. Unless small children are going to crawl under your chair and notice (and care) that your chair undersides are not perfectly beautiful, skip it.
It only took about 10 minutes to staple the new fabric onto the chair seat, and our house looks completely different with just one small change. I’m looking forward to repainting the chairs, too – that will really make a huge difference!

Excellent work! Can I sit on them now?
Good work! I love the fabric you’ve chosen too.
Beautiful work.
Geraldine
Wow, what a difference. Great tips too!
i like velvet seat covers because the texture is very special and i find it easy to clean .:”