Archives for posts with tag: quilt

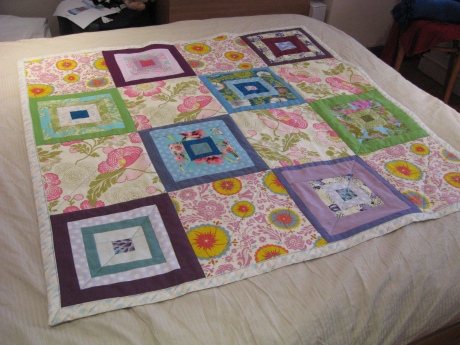
So, after the quilt I made for my brother-in-law using his old shirts, I went to work on several baby quilts.  This one is for a friend’s baby girl, who was one of the only girl babies to be born to the many friends of mine who have had babies this year.  It was so much fun making a girly quilt.

Baby quilt

Baby quilt

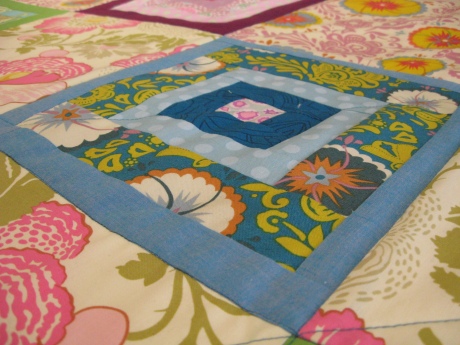
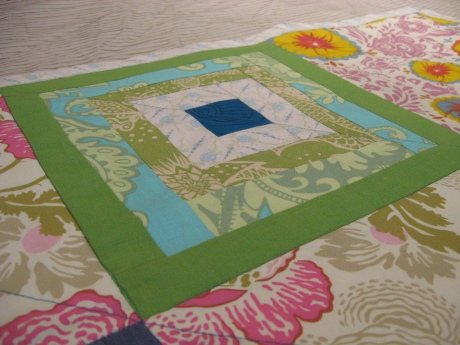
For the plain squares I used two designs by Anna Maria Horner which I had bought a while ago and was saving for something fun.  The eight other squares were made mostly with scraps that were left over from a workshop at the V&A, which I helped to organize.  I love that I didn’t buy any new fabric to make this quilt!

Baby quilt detail

Baby quilt detail

This was the first time I’d tried diagonal quilting – in all my previous quilts I’ve always stitched in the ditch.  I loved the effect and have used it in subsequent work, and it’s made me think about different ways I can quilt projects in the future.  I’ve officially graduated from trying to hide my quilt stitching!  It’s much more fun to let it show.

Baby quilt detail.

Baby quilt detail.

Brother-in-law's quilt, top side.

Brother-in-law's quilt, top side.

It’s been ages since I last posted (and by the way, I did finish my script for Script Frenzy), but I haven’t been lazy.  I’ve made several quilts in the last few months, one large and a few small.  And now that I have joined the Committee of the London Quilters as their new Secretary, I better get cracking and show those quilts off!

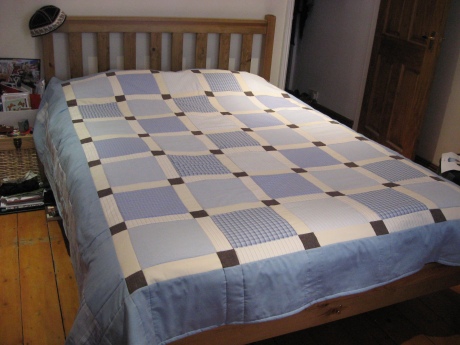
The first one is one I made for my brother-in-law to put in his new house, which he bought in February.  Since I thoroughly enjoyed making my first quilt out of my husband’s old shirts, I decided to do the same for my brother-in-law and upcycle the shirts he didn’t use any more.  I asked my mother-in-law to secretly send me all of the old shirts he was about to send to the bin, and I cut them up and made a huge quilt out of them – with different designs on the top and the bottom.  Luckily, he wears a lot of blue – so everything matched. The little bits of brown are from a pair of trousers (my husband’s, not my brother-in-law’s).  I can’t say for certain that every single piece of fabric came from one of his shirts, but they were either worn by him or by his dad or my husband, so it’s all in the family.
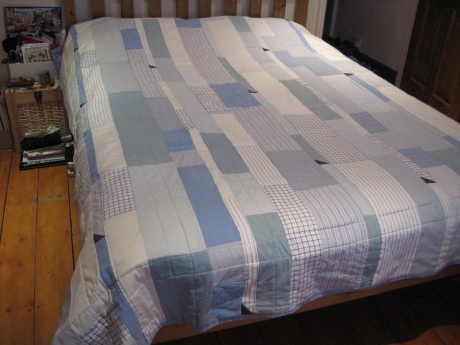
Brother-in-law's quilt, bottom side.

Brother-in-law's quilt, bottom side.

The quilt was made as a surprise and it certainly was.  I was really pleased with the reaction from my brother-in-law – he really appreciated it.  I was less pleased with the two days of neck pain that I had after frantically quilting for 9 hours the night before I gave the quilt to him.  Our kitchen table was no match for the weight and bulk of a king-size quilt.  I hadn’t realized how much of the weight I was managing with my neck and shoulders while putting the quilt through the machine.  It sure took me out of action for a couple of days!  Next time I make a quilt this big I’ll have to think about how to save my muscles and not overload them.  It was worth it, though.
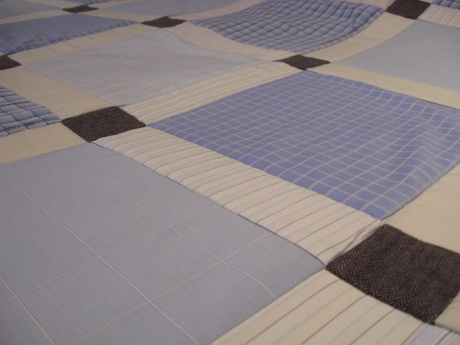
Brother-in-law's quilt - front detail.

Brother-in-law's quilt - front detail.
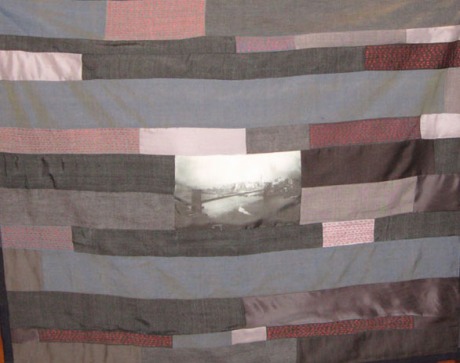
I made this quilt six months ago for my husband’s birthday and keep forgetting to blog about it!  It’s a lap-sized quilt rather than a full one so he can easily bring it from room to room and use it all over the house, particularly (right now, anyway) in the study, which is the site of most of his PhD work. His thesis is on an American modernist poet, Hart Crane, whose most famous work is an epic poem about the Brooklyn Bridge.

Brooklyn Bridge quilt front

Brooklyn Bridge quilt

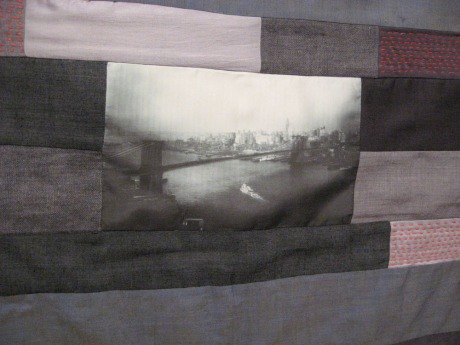
I made the centre panel in one of the V&A’s Digital Textile Design courses (the perks of being one of the supervisors is you get to do one too if there’s time!), with a photo of the Brooklyn Bridge that I found on Flickr (with Creative Commons licence, of course).  The photo was printed on silk.

photo detail

Centre panel printed on silk

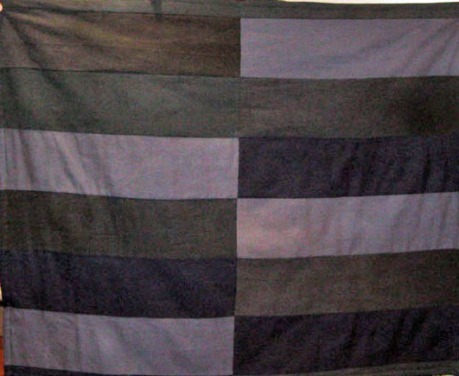
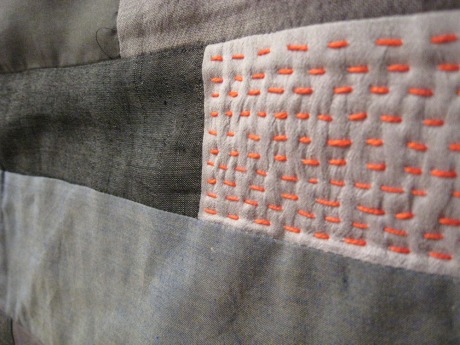
The gray pieces of fabric on the front are scraps from a colleague who sews all her own clothes (only in gray), and the back is made entirely out of old trousers.  I did the orange quilting by hand in perle cotton.  I wasn’t sure it would look good with the grays, but it did, and now orange and gray is one of my favourite colour combinations.

Brooklyn Bridge quilt back

Who'd have known old trousers could be so useful?

detail of stitching

Detail of quilt stitching

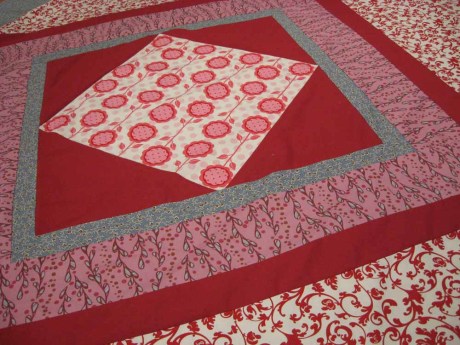
Pink/red/blue side

Pink/red/blue side

My sister loved the pictures of the birthday quilt that I sent her a couple of days ago.  The work still isn’t done, but here are a few pictures of both sides with the full design and some details.

I’m currently working on the assembly and quilting part.  I’ve done this before, so I knew what to expect, but this time it’s a little harder because it’s double-sided and I have to make sure that the designs line up the right way.  I’ve therefore basted one side of the quilt to the batting, and now am about to attach the other side.

Green/red/blue side

Green/red/blue side

The usual instructions in quilting books and on websites say to attach with safety pins first, then baste by hand.  That’s what I’ve done, and it works pretty well.  What really gets me, though, is that out of all the advice and instructions in a book or on a site, the assembly part only gets about a page or two of text and rarely merits a picture.  That can be a real shock when a first-time quilter comes to do the assembly, and realizes that even after the hours and hours they’ve spent doing the patchwork, they still have a huge amount of work left.  It takes at least an hour to safety-pin a bed-sized quilt together, and about 2 hours to baste by hand – and you also have to find a big enough floor space for it all to happen.  I wish more quilting publications focused more attention on this stage.

Detail of green/red/blue side

Detail of green/red/blue side

Here’s a sneak preview of a quilt I’m making for my sister’s birthday.  I’ve nearly finished with the patchwork (both sides – it’s double-sided because I couldn’t decide what fabrics she would like best!), and I’m estimating the basting, quilting and binding will take another 2 weeks – so it’ll be done just before her birthday.  Too bad she lives in Canada and it’ll get there late!

It needs ironing, as you can see.

One side of the double-sided surprise birthday quilt

One side of the double-sided surprise birthday quilt

The no-measuring quilt

The no-measuring quilt

I bought some remnant fabric at the Marimekko shop two weeks ago, with the idea that I would make a quilt with it plus whatever I could find that matched.  I supplemented the beautiful green and maroon ginkgo prints with some plain green fabric from Kaffe Fassett, which I bought from Liberty.

Since the remnants were all the same size, I figured I’d just cut them and sew them into randomly-sized strips without having to measure anything, and then join those strips together with some (still-to-be-bought) fabric in a matching colour.

The reason I loved this idea so much is because I hate measuring.  For a person so mathematically-inclined, it’s kind of an odd trait, but I just loathe taking out a ruler or cutting straight lines.  I like measuring by eye (I do pretty well drawing and cutting straight lines without help) and then sewing together by trial-and-error.  Perhaps that’s why some of the clothes I’ve sewn in the past haven’t fit exactly right, but it’s also why some of them fit better than they would if I’d stuck to the original pattern (at least I can personalize the waist-to-hip ratio on a skirt, for example!).  Anyhow, I decided to try a no-measuring quilt this time.  We’ll see how it turns out.  I’m liking it so far!

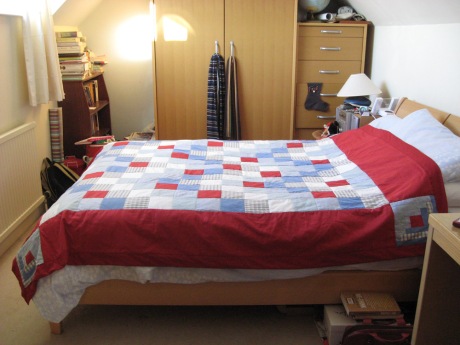
I finally finished the quilt I’d been making for the last 5 months… it only took 5 more hours of work!  I can’t believe I had it in the house so long and didn’t realize that there was so little left to do on it.  The holidays certainly helped me find 5 hours in a row to finish it up.  We’ve been sleeping with it for the past week, and although it isn’t as thick as I thought it would be, it certainly is comfortable.  I was worried about the bottom layer, because it was newly-bought cotton and it was very stiff until after about six washes.  The top never worried me – most of it is my husband’s old shirts, cut up!  A new use for old and beloved clothing.  And since it’s still the holidays, I’m already on a second quilt project…

Finished quilt on bed (on top of regular duvet)

Finished quilt on bed (on top of regular duvet)

I’m making a quilt out of my husband’s old shirts.  I’ve been working on it since July, with a couple of long lulls in between bouts of activity.  The big lull was because I was afraid of starting the actual quilting part – I was fine with putting together the pieces for the quilt top (they’re only plain strip squares, after all, so how complicated could they be?), and I even attempted some log cabin squares which turned out pretty well.  But getting that layer attached to the batting and the bottom layer really threw me for a while.  I did lay it out and safety-pin it and then baste it, but I was worried about getting it through the sewing machine with all those layers.  Hand-quilting the whole thing, though, was out of the question.  So after a few months’ hiatus, I finally tried machine-quilting.

Quilt top - as of August 2008

Quilt top - as of August 2008

It was much better than I expected.  My needle didn’t immediately break, and in fact the layers didn’t seem to cause the machine any trouble at all.  A relief.  So now I’m working on ‘quilting in the ditch’, which is basically sewing along the seams that already exist.  That part is what’s causing me trouble.  Usually I can draw a pretty straight line, but when I’m feeding a really bulky piece of fabric into the sewing machine I find myself unable to sew in a straight line!  Some of my stitches have veered off slightly before I could stop them.  But no quilt is perfect, and it’s my first one, so I’m happy with the results so far.  I do have a backache from being at the sewing machine for a while, though!